Print Account for Coworker
If you use one of our coworking offers, you can also use our printers.
Because of privacy concerns we set up a “pull printing” system. This means that you “print” to our print server, then go to one of the physical printers and start the print by logging in with your printer account. That way nobody else can see your prints.
Because of this you need an account for our print system. We made the process of creating an account as easy as possible. In the following guide we will explain what you need for this and how you can get it.
Creating a “Factory Campus account”
Are you already in our Slack? If not please a ask a Host to invite you. If you don’t want to use Slack, please ask one of the hosts as well so you can get an account via an alternative way.
Please open the search bar in Slack
 and search for “Accounts”.
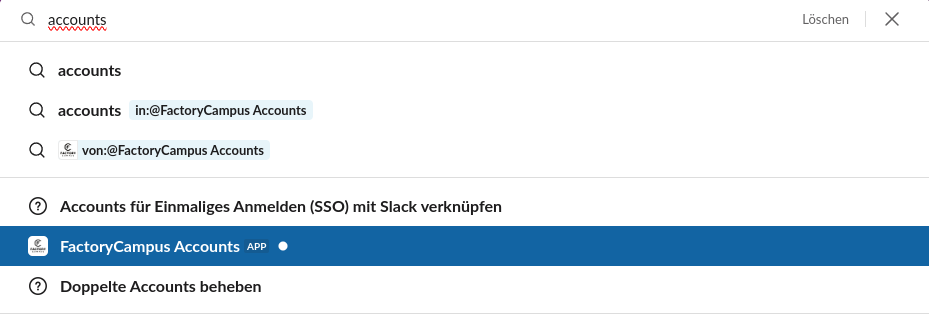 Click on the result “Factory Campus-Accounts”.
Now write a message in the newly opened chat. Don’t worry about the content of the message! You are only talking to a robot.
Click on the result “Factory Campus-Accounts”.
Now write a message in the newly opened chat. Don’t worry about the content of the message! You are only talking to a robot.
You should have received a username and password as a response, please save them somewhere secure (e.g. in a password manager).
🎉 You have acquired a “Factory Campus account” and have therefore finished the first step.
Take a break
Because of technical reasons it takes up to 5 minutes until the account creation is finished. Get a coffee ☕ and relax a bit.
Setting up your Print Account
Now that you have your “Factory Campus account”, you are able to login into the printer portal.
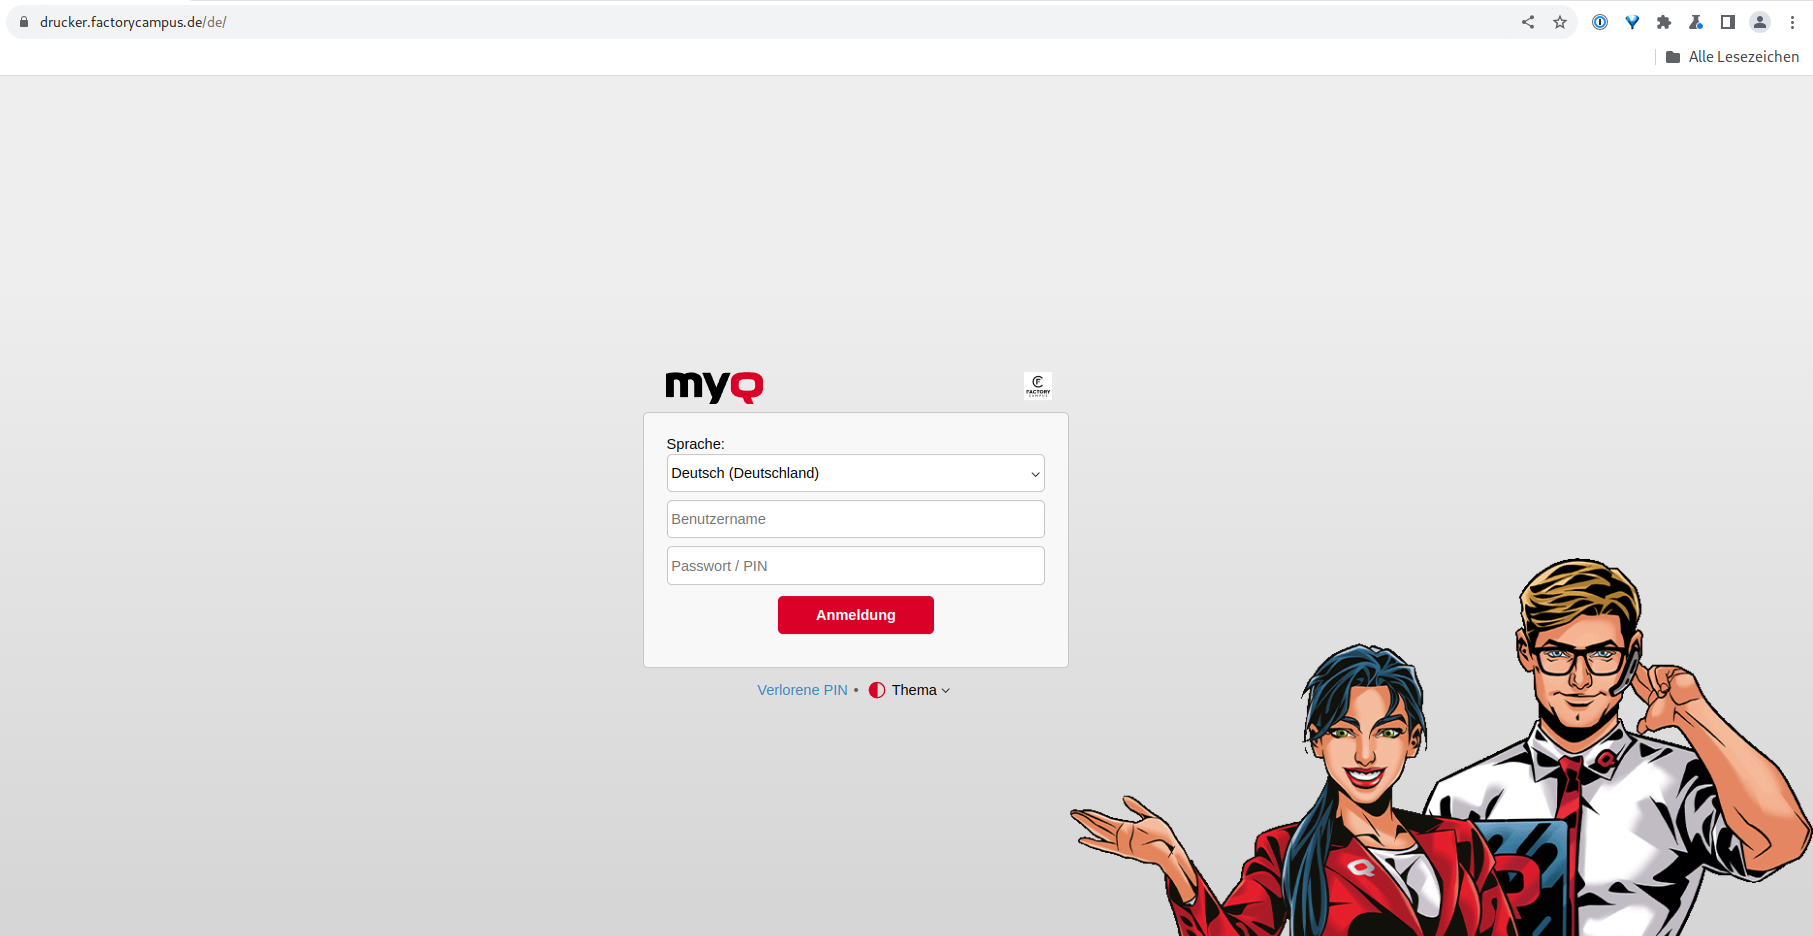
Info
You can change the language of the MyQ Interface by choosing your desired language in the top field (“Sprache” in german, “Language” in english).
After logging in you are greeted by the overview. Now go the section “User Profile” and generate a PIN by clicking on “Generate PIN…”.
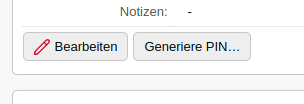
Save this PIN somewhere secure.
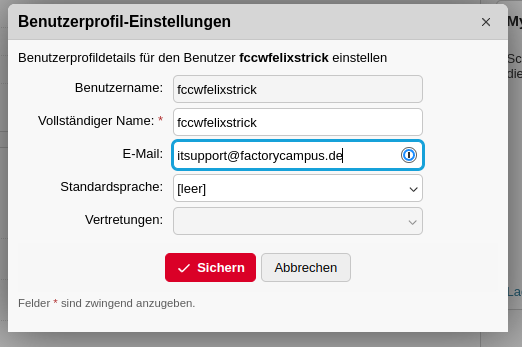
At last you need to click on “Edit” and enter your e-mail address into the field “Email”, then click on “Save” to save these changes. This allows you to send scanned documents to your e-mail.
Connecting a transponder
You can connect a transponder/key card (e.g. the one you use to enter the building) to your Print Account which allows you to login by simply holding the transponder at the printer instead of entering your PIN. To set this up you need to go to one of our printers.

First you need to login by entering your PIN via tapping on the PIN field.
Tip
You can scan the QR code on this screen with the “MyQ X Mobile Client” app to login
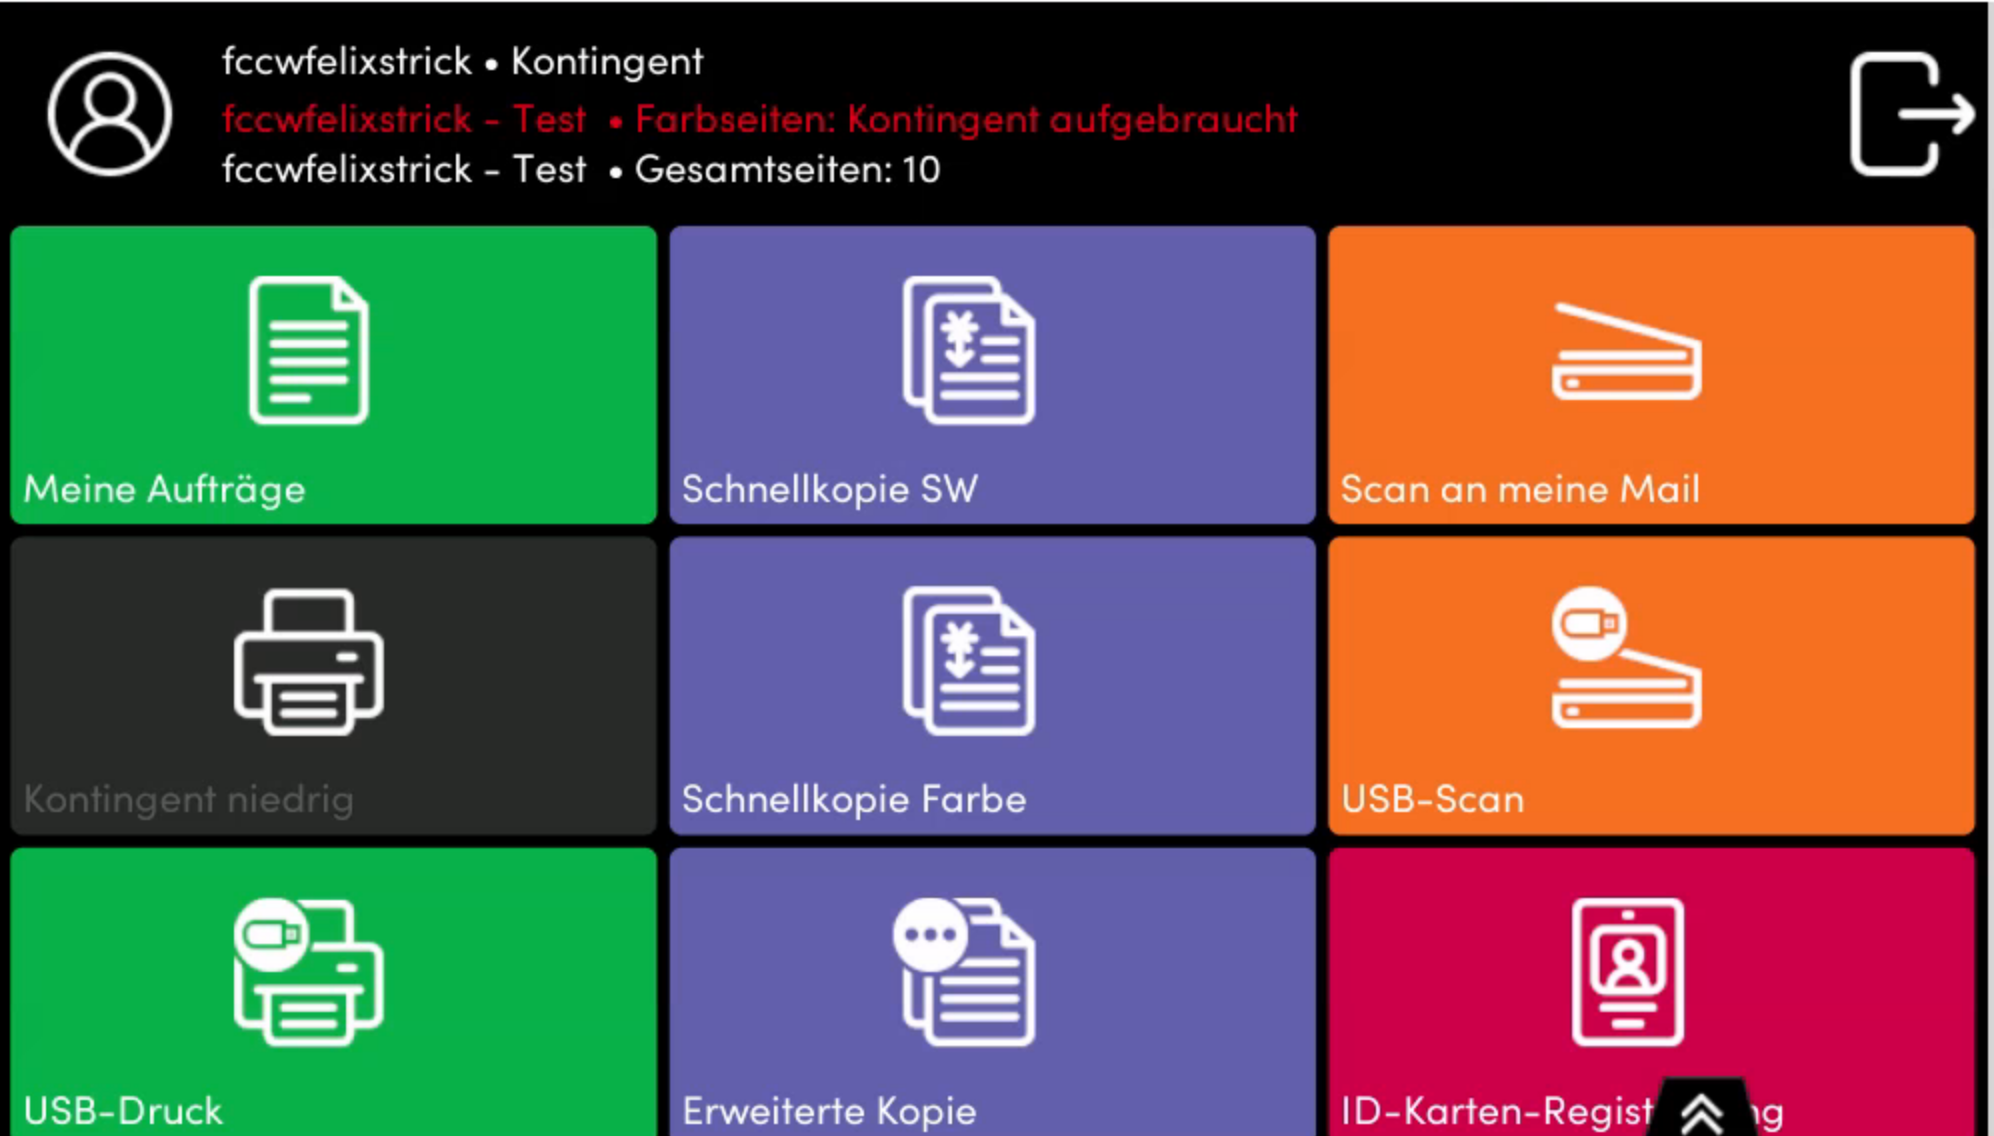
Now you need to tap on “ID-Karten-Registrierung” (“ID Card registration” in English) and hold your transponder at the printer.

You can now logout by tapping on the following icon:

Activating the Print Account
To finally activate your account please talk to the hosts and have your username ready.
Printing
The easiest way to print is by going to our print portal, clicking on “Print File…” and uploading the file. Afterward, you can go to one of our printers and initiate the print by holding your transponder/key card at the printer and tapping on “Drucke alles” (“Print all” in English).
If you print often, you might want to set up printing directly from your computer. We have a guide, in German, for that here.